Tuesday 7 December 2021
Saturday 4 December 2021
Almost finished my Autumn journal
Pages 17 and 18
19 and 2021 and 22
23 and 24
25 and 26
finally, 27 and 28
I really enjoyed doing this one!
Sunday 14 November 2021
Thursday 7 October 2021
Monday 4 October 2021
Sunday 26 September 2021
The outside front and back covers
I sanded down the outer cover as it was quite shiny. A coat of Modge Podge was applied and left to dry. I painted that with a pale blue irridescent paint. Once dry it was decorated with some pictures:
Overall, for my first journal, I am really pleased with it.Friday 24 September 2021
More summer journal pages
I just love the happy abandonment of this little girl:
The inside front fly sheet:
Thursday 23 September 2021
What to use in your journal
It depends on how much you want to spend! There are many scrapbook and journal things for sale online and in the shops. Some people use magazine cutouts or pictures from book. The latter is what I tend to use with bought things used to decorate and add interest to those.
Decide how much space you wish to leave for writing. Choose a theme (or don't). I like to chose what I want to use and play with putting it together before I start to stick things down. Lined or plain paper can be used to leave spaces for writing. I also double paint pages with matt enamel household paint as an alternative.
Again, completely cover the back of anything you want to use with your glue before adhering it to your page.
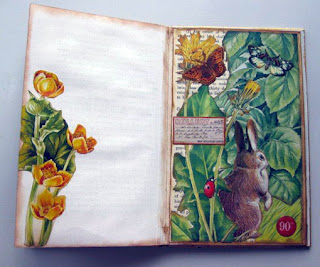
I actually couldn't think of anything to journal about being so new to it so chose to do the seasons. This first journal 'Summer" was begun in mid June and completed sometime in late July. Now I have finished photographing it, I can write in it at last. This first double spread of pages is the inside fly sheet and title page:
Once every thing was stuck into place and completely dry, I then used coloured pencils to enhance the colours of the original images:
This picture below shows pages folded back on themselves, the fold stuck down on the inside before glueing the edges of it to the page below to form a pocket. Large tags have been created with space on the back of them to write on, then popped into the pockets:
Tuesday 21 September 2021
Preparing your book - thinning the signatures ready to take your work
This part may be hard to describe and understand but there are quite a few Youtube videos to help. I prefer to find the signature closest to the middle of the book to begin.
Open your signature and count how many pages there are, counting just the left hand one for now, until you get to the right hand page of the next signature. Say it comes to 14. Aim to remove no more than 1/4 of this number (get it down to 10) to begin with. Return to your signature where you started and carefully tear down the middle, close to the stitching, from top to bottom and remove both of the sheets.
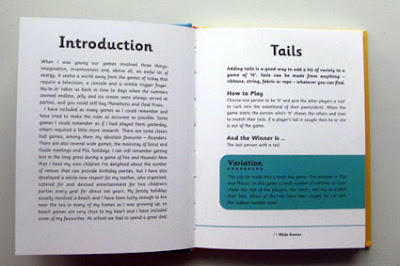
Before progressing further and ending up with too thin a signature, count back towards the middle of the previous signature. Using the top left hand side of the signature you are working in and looking at, in this case entitled Sardines, count it and the page below,
entitled Capture the Flag, as one pair:The back of Sardines and the back of Capture the flag will eventually be glued together to create one sheet. Keep counting until you come to the right hand side of the next signature as your final pair. In this case the back of Variations will glue to the back of Tails which is the right hand side of the signature below it:
Making sure each side of a signatures is glued to the sheet after or before it, prevent them from falling out as you work on your journal. It sounds far more complicated than it is, hence looking on Youtube.
It took me an absolute age to get to grips with this procedure and I often ended up with a single sheet that didn't have another to pair it to. Whatever you do, DO NOT tear these out, just glue them to a neighbouring pair, forming a triple sheet.
Now you need to glue your pairs of pages together, each pair forming a new thicker single sheet. I tend to use UHU or Pritt for this as anything too wet like PVA glue will cause the pages to ripple. Then you are ready to decorate how you wish.
Monday 20 September 2021
What type of books do I look for?
I always buy secondhand, usually from the charity shops, preferring to spend no more than £1 if possible.Below are two books that were 50p each:
I like to look for books without a shiny protective cover but needs must if the inside is what you want. More about shiny covers later!
Look at the spine of the book, you can see several signatures. A signature is several pages bound together, many signatures make a book. It won't be as obvious as these pictures as I have begun to strip the signatures down ready to use. More of that later:
Open the book and find the centre of one of the signatures. You want to be able to see stitching, which both these book have:
If you can't find any, it is a glued spine. Some people prefer glued spines, I prefer stitched as they work better for what I want to do with them.
Try to not find books with too thin a page as it makes for more work in the next stage. The Mice and Men pages are thinner than the You're It, but again, for me, I can work around that.
Sunday 19 September 2021
Let's start at the beginning
Recently, I have discovered how to create and decorate a journal. There are numerous ways of doing so. After many attempts, I finally found a way of working that really appealed to me.
My 'thing' if you like, is buying a cheap secondhand book, altering it both inside and out, before decorating/embellishing it.
This is my journey. Pull up a chair, have a cup of whatever takes your fancy and join me.


